Based on client feedback, the model for the "Cymatics" project is getting close, but as with any project, the last 10% takes the longest. With the previous model attempt, patching a series of elevated curves, there were a series of irregular bumps along each of the ridges, which the client didn't want. Also, she was hoping that the model would "telescope" upward in order to form a tower of sorts in the middle. In order to make these changes (and projecting more tweaks down the road) I sought a third and final method to generate the model.
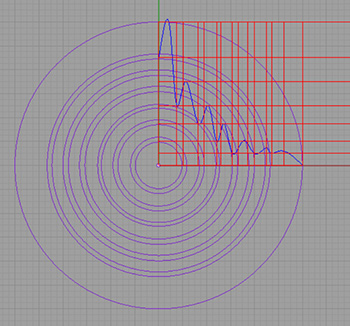
 Unlike my last method of patching contours, this new method would derive from manually drawn profiles of the form. It's like drawing a profile of a mountain rather than a map of it's terrain. To make sure the profile derived, at least partly, from the original image, I traced the major outlines as a series of concentric circles (Purple Lines.) When making the profile (Blue Line,) I aligned each point with the vertical extension of those circles (Red Lines.) In short, I was projecting from plan to section.
 Once I had the profile curve, I needed to tell rhino to use that as the radial profile for most of the revolution. All it took was a simple
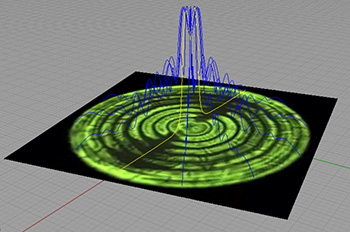
 arrayPolar command. I also had to create the part where the rings "died off" so to speak. I started with one of my arrayed profiles and used _EditPtOn to select the control points for the curve and flatten it out. I copied this "flattened" curve to the other side, where the rings also appear to "die off."
 With the profiles drawn and arrayed, I selected each one and used the
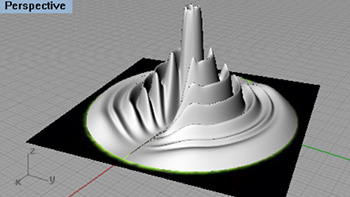
 loft command to create a surface. This step is the quickest in theory, but it is also a point-of-no-return. If I had been smart and foreseen the number of times those control profiles would need to be adjusted (by change request of the client,) then I would have built a grasshopper script to automate this step. Instead, I found myself repeating this process manually over and over.