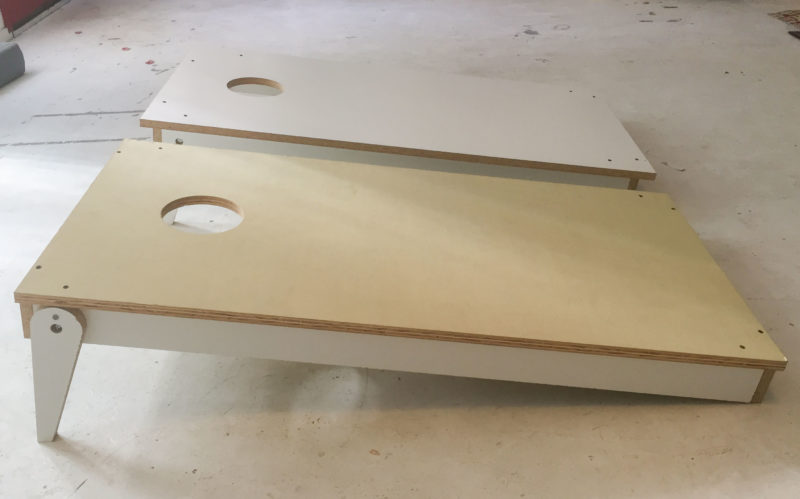
Lookit! I made my own cornhole boards!
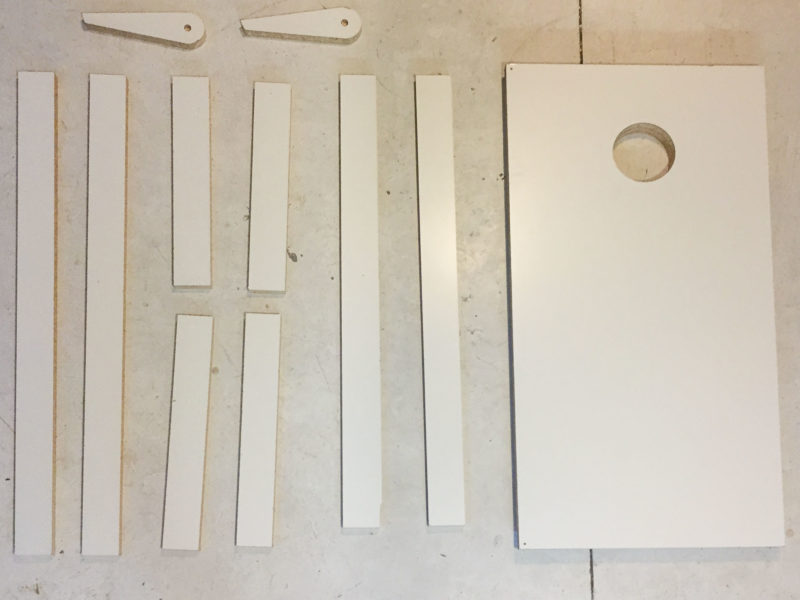
I know... cornhole is hardly rocket science, but for some reason, whenever I make something straightforward like this I always find a way to make it more complicated. Nine times out of ten, I wind up add a function or movement to a part that's not meant to move. For these corn hole boards, I wanted a good way to pack and store them away. Folding down the legs is an obvious place to start, but I took it one step further. My design allowed the 2 boards to nest together forming a single, compact box; the base of one board would fit into the base of the other. However, since the boards have to have identical angles, the legs of the board would have to make up the difference between the two bases. I worked out digitally before cutting each piece out on a CNC. I'll try to do an update with the files and assembly drawings for download in case anyone wants to make a set for themselves.

The material I used is melamine particle board, which I now know was a bad idea. Since I assembled mine mostly with drywall screws, it was a challenge to screw into the soft inner core. Once or twice I had to move screws to a new location after they tore out of their hole completely.


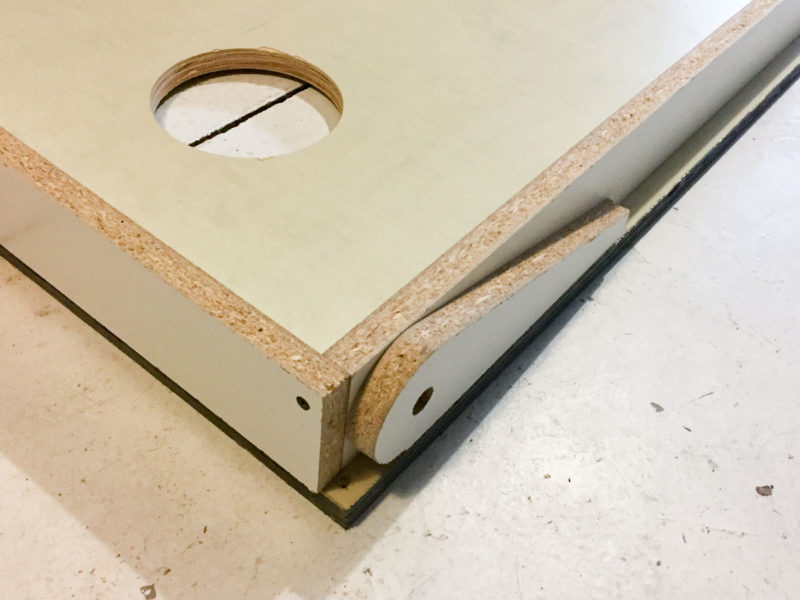
The fold down legs are pinned to the side rails on a central pivot point. I didn't know exact bolt sizes when I designed it, but I knew the bolt heads and nuts would need to sit within the thickness of the wood. Without drilling the exact hole all the way through, I cut a pocket around the hole, half-way into the material. After I had a chance to go to Home Depot to pick out some hardware, I drilled the holes at the center of these pockets.

There's an obvious flaw with this detail. What's to stop the leg from moving when it's extended? Rather than an oversight, I intentionally designed it to pivot a full 180 degrees. Originally, I was going to use the fully rotated legs to add some kind of handle with casters on the opposite. I'd lock the legs at the corn hole angle with a removable pin drilled in at just the right spot. However, I've since abandoned the handle idea, so I'll have to remake that back rail.

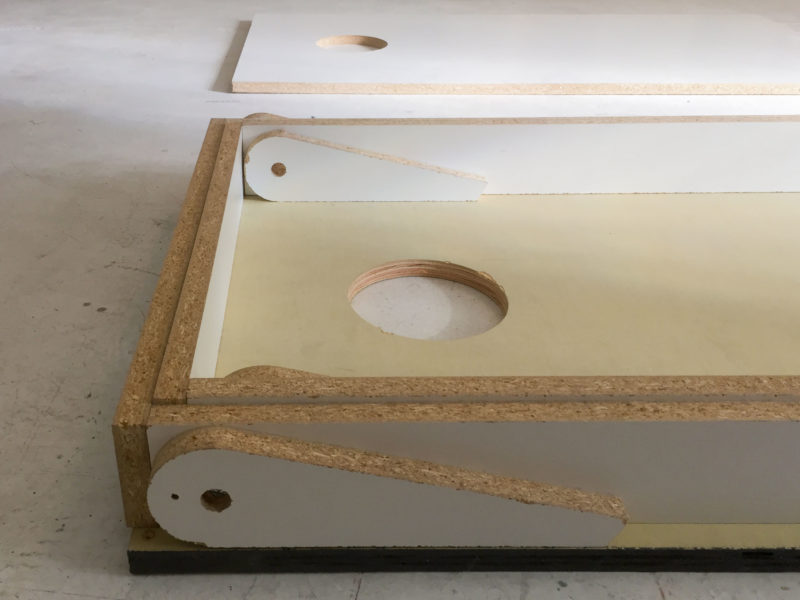
It seems obvious, but one of the eureka moments in the design was realizing that the outside base could have it's legs on the outside, while the inside base could have them on the inside. While making the first base, I had to check that the pieces of the second would fit within. Since the walls of the second base would be further inset from the base edge, I needed to make those those walls taller in order to keep the height and angle of the two boards identical. This was probably the trickiest detail to work out, especially after I realized I also needed an air gap allowance between the two.

The actual assembly of the box happened in an hour or two: bolting on the legs, screwing together the outside base, then the inside base. Here is the side by side! Unfortunately, USPS messed up the bean bag ordered on Amazon. When I went to pick up the package, I was shown an empty box! Maybe I should make those myself too?